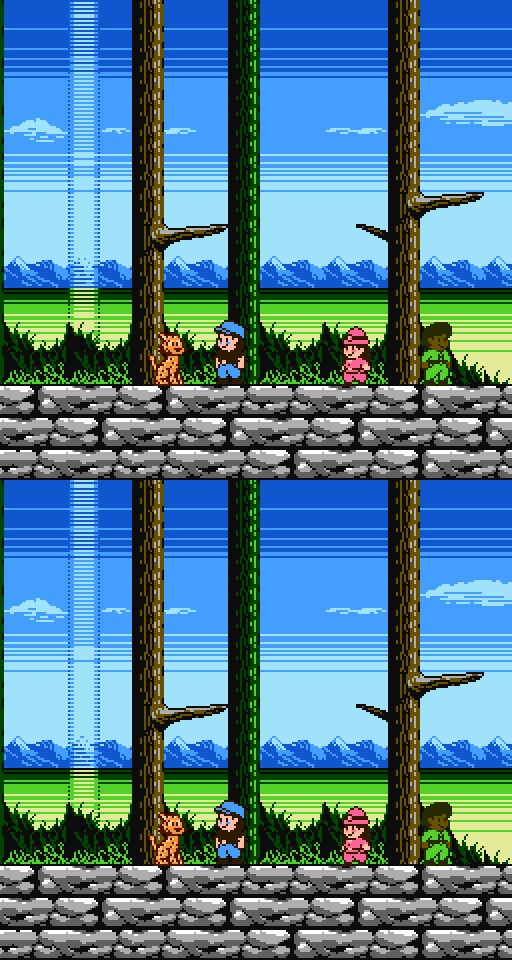
As I’m making my PC game Super Hiking League, sometimes I need a break. Recently, it’s been in the form of translating some of its elements into a NES homebrew program. I can’t call it a game yet, as there’s very little going on gameplay-wise.
Still, it was quite an achievement for myself to get something not only being displayed on screen, but with interactivity resembling a videogame! So I decided to share this as an out-of-the-box, 100% portable, working project that compiles a NES ROM with graphics, screen transitions, music and interactivity. It is for Windows only, and since it uses the graphics from Super Hiking League, it is for educational purposes only, unless stated otherwise. Look in the license.txt file for more info on this.

By running the batch file, it generates a NES Mapper 3 ROM with 2 16k PRG banks and 8 8k CHR banks, with vertical mirroring. You can edit these settings on the nes.cfg and header.asm files in the system folder, provided you know what you are doing. Included in the zip are the ca65.exe and ld65.exe programs required by the batch file. So hopefully, absolutely no configuration is required. Just unzip the folder and run the batch!
I feel like not many working projects such as this are available out there, so here it is! The code is all in assembly language. Use any text editor for the files. The main file is “main.asm” in the src folder. Disclaimer: the code comes from an unexperienced NES developer who’s just really happy that it works, so you may use it to try things out, but do not take it as an example of good coding practices, as I’m pretty sure it’s far from that!
List of features:
– It works! yay!
– It displays graphics!
– Graphics are in CHR format (compatible with yy-chr and Nes Screen Tool). In the case of NST, save the 8k file.
– Palettes! (compatible with yy-chr). NST palettes will not work as is, but it should be easy to convert the palette reading section for that format.
– Uncompressed nametables! (compatible with yy-chr and NST). Nametables must contain attributes at the end of the file.
– Chr switching!
– Controller works! The player reacts. You can jump (height is controllable), and you can move left/right.
– Rudimentary Scrolling! The screen will scroll showing nametable 2 and it will wrap around seamlessly to nametable 1.
– No tile collision! The ground is hardcoded.
– Metasprites!
– Game states!
– Sprite flickering!
– Probably horrible coding! But it works out of the package, so that is a plus. I’m still a terrible asm programmer, so do not learn from my code, please!
Recommended tools:
– Sublime Text 3
– YY-CHR
– Shiru’s Nes Screen Tool
– Famitracker
Sublime Text 3
A Sublime Text 3 project is provided, but not necessary. If you use it though, there are some advantages:
I have provided a syntax highlight file, modified from a nice one I found online called “ASM 6502 (xkas-plus)”.
This helps writing code in ASM by highlighting code, data, etc.
Copy both ASM and USER folders to ST3’s package folder. You can find it going to preferences, browser packages.
Then it will not only show the new syntax, but also compile the code directly from ST3 and run the game in the end
just by pressing F5!
I hope you enjoy this example and that it helps you get started on writing assembly for the NES.
– Nesrocks
2018
Bah, muito legal. Obrigado por compartilhar.
Excelente trabajo! Muy profesional! Agradecido!